Blog
Why Is Bathroom Fan Noisy? Causes and Fixes

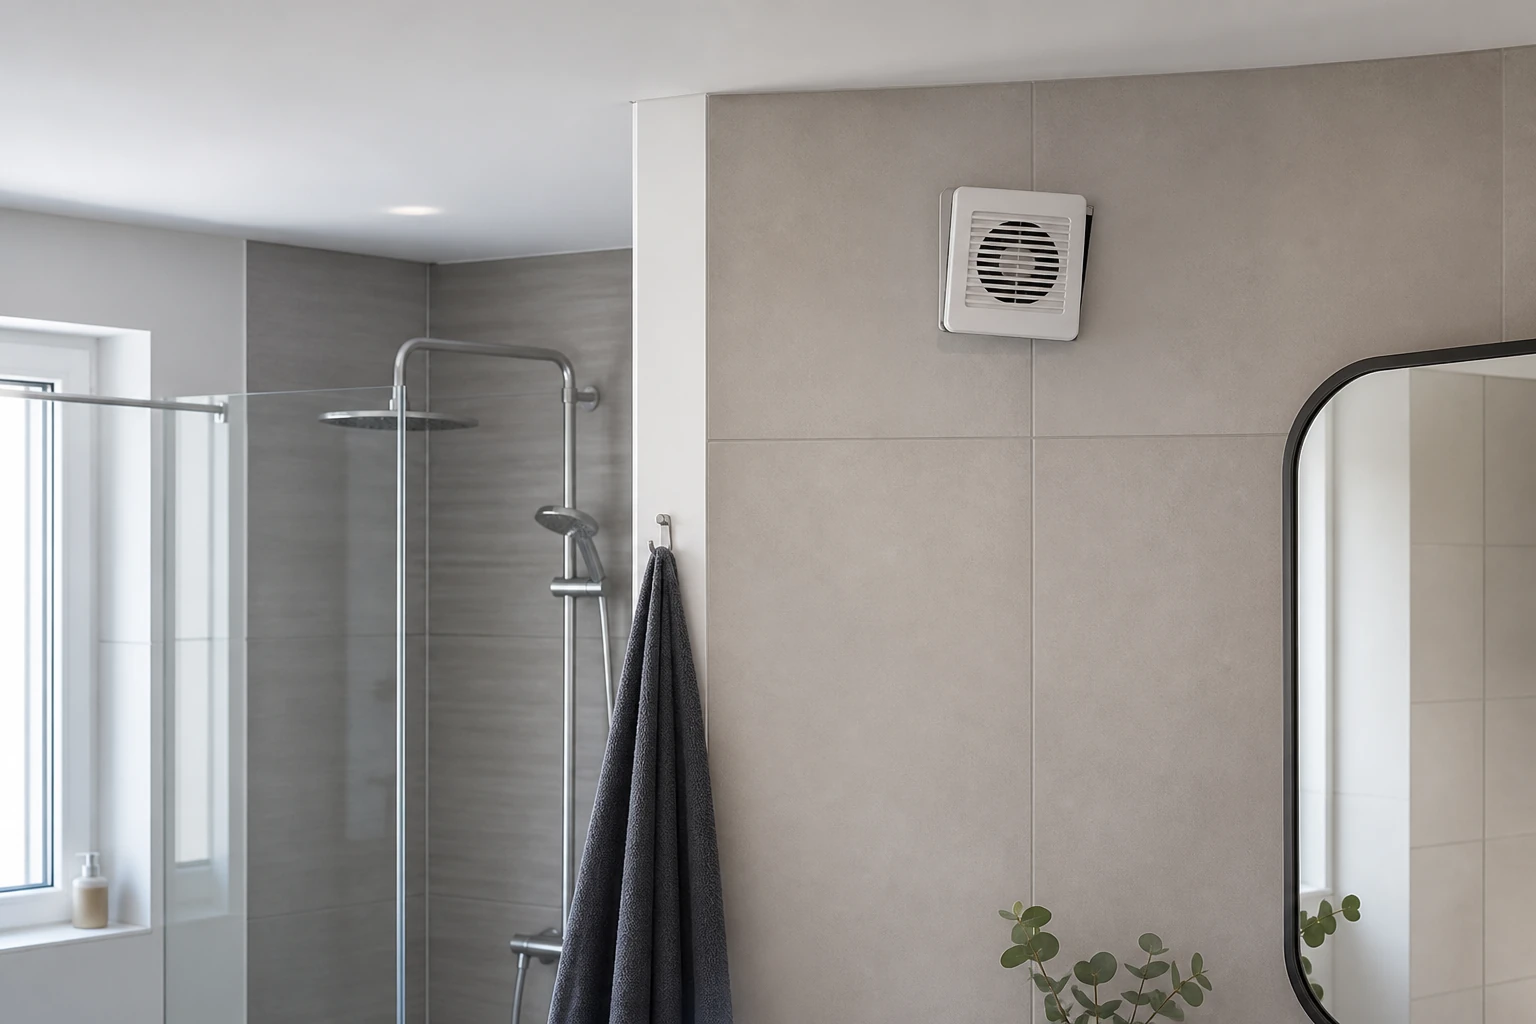
A bathroom fan that suddenly rattles during a shower, hums after the light is switched off, or sounds like air is being forced through a whistle is not merely irritating. The question, “why is bathroom fan noisy”, usually has a practical answer: either the fan itself is worn or dirty, or the installation is creating resistance and vibration that the fan has to work against.
A little operating sound is normal. An extractor moves air through a grille, housing, duct and external terminal, so there will always be some motor and airflow noise. The concern is a change in sound, excessive volume, vibration transmitted into the ceiling or wall, or poor extraction despite the noise. Finding the source before replacing the unit can prevent the same problem returning with a new fan.
Why is bathroom fan noisy? Start with the type of sound
The character of the noise is often more useful than its loudness. A light, steady airflow sound may be normal. A mechanical rattle, scraping noise, pulsing drone or high-pitched whistle points to a different part of the system.
A rattling grille or buzzing cover commonly means a loose front plate, fixing screw or backdraft shutter. Only inspect a cover that the manufacturer identifies as user-serviceable, and first isolate the fan circuit safely. Do not open the electrical enclosure or touch wiring. With those limits observed, check whether the cover is correctly clipped into place and whether any accessible shutter can move freely. Dust can prevent a shutter from closing smoothly, and a slightly distorted plastic grille may vibrate at certain fan speeds.
A rough hum, grinding or squeal from inside the fan housing is more likely to be a motor or bearing issue. Older fans with worn bearings can become noticeably louder before they fail. Cleaning may remove dust from the impeller, but it will not restore damaged bearings or a failing motor. If the noise remains when the cover is removed and the impeller is clean, replacement is usually the sensible long-term repair.
Scraping or ticking often indicates that the impeller is touching the housing or that debris has entered the unit. Paint flakes, plaster dust and accumulated lint can unbalance the impeller. This is particularly common after bathroom refurbishment, when a fan has been left uncovered during drilling, sanding or decorating.
Use the timing and location of the noise as a diagnostic clue
- Only while the fan runs: compare a mechanical grind or tick at the housing with rushing or whistling along the duct.
- After switch-off: check whether a timer is completing normal overrun, or whether a shutter continues clicking.
- During wind: listen at the external terminal and backdraught flap.
- Only on boost: suspect higher airflow noise, a restriction or vibration excited at that operating speed.
- Loudest away from the fan: inspect the duct, terminal and lightweight surfaces for turbulence or resonance.
| Observation | Likely cause | Practical check | Next action |
|---|---|---|---|
| Rattle or ticking | Loose grille, shutter, debris or impeller contact | With the circuit safely isolated, inspect only user-serviceable parts | Clean or secure accessible parts; arrange service if contact persists |
| Grinding or squeal | Bearing or motor wear | Check whether noise persists after safe cleaning | Arrange fan service or replacement |
| Whistle or rushing | Restriction, reducer, terminal or high local velocity | Inspect the route and terminal; measure installed airflow if needed | Correct the restriction rather than simply fitting a larger fan |
| Drone through the structure | Vibration transfer or resonance | Compare noise at the fan, panel and nearby duct | Correct mounting, support or contact points |
| Clicking in wind | Backdraught flap or exposed terminal | Listen with the fan off during windy conditions | Service or select an appropriate shutter or terminal |
Catalogue airflow is measured under stated test conditions. For diagnosis, measured installed airflow at the system’s actual operating point is more informative than the nominal free-air figure alone.
For a broader troubleshooting checklist, see how to reduce extractor fan noise. If the main symptom is poor moisture removal rather than noise, use the separate guide to a bathroom extractor fan not removing humidity.
Dust and worn components inside the fan
Bathroom extractors collect more contamination than many homeowners expect. The moving airflow carries lint and dust from towels and clothing, while aerosols and cleaning products can leave a sticky film on the grille and impeller. Moisture contributes to the bathroom conditions, but it is the airflow—not moisture itself—that transports the particles. This build-up reduces free airflow and can make the impeller unbalanced. The motor then works harder, and airflow noise may increase because the fan is operating less efficiently.
With the circuit safely isolated, clean only the grille and components that the manufacturer identifies as user-serviceable. Use a soft brush or vacuum nozzle where the instructions permit. Avoid soaking the motor area, bending blades or using aggressive solvents on plastic components. If the fan is connected to a timer or humidity controller, remember that it may continue running after the light is switched off. This expected overrun is a control behaviour, not a reason to delay safe circuit isolation before manufacturer-permitted cleaning.
Cleaning is worthwhile where the fan was previously quiet and has gradually become louder. It is less likely to cure a sharp mechanical noise or a unit that has become difficult to start. Persistent electrical hum, overheating, tripping, a burning smell, damaged wiring or water ingress requires the fan to be switched off and assessed by a qualified person. Electrical enclosure or wiring work is not a homeowner troubleshooting step.
Ducting can be louder than the fan
A quiet-rated fan can still be noisy in a poor duct installation. The published sound level for a fan is measured under specific test conditions. Once installed, the noise heard in the bathroom depends on the duct route, pressure loss, mounting surface, external grille and the room’s acoustics.
The most common installation problem is restrictive ducting. Long runs, tight bends, crushed flexible duct, undersized duct diameter and blocked external terminals all increase resistance. The fan and duct system settle at an operating point. When duct resistance increases, a fixed fan will commonly deliver less total airflow than its catalogue or free-air rating. A reducer, tight bend or blocked terminal can still create high local velocity and turbulence—and therefore more rushing or whistling noise—but that does not mean total system airflow has increased.
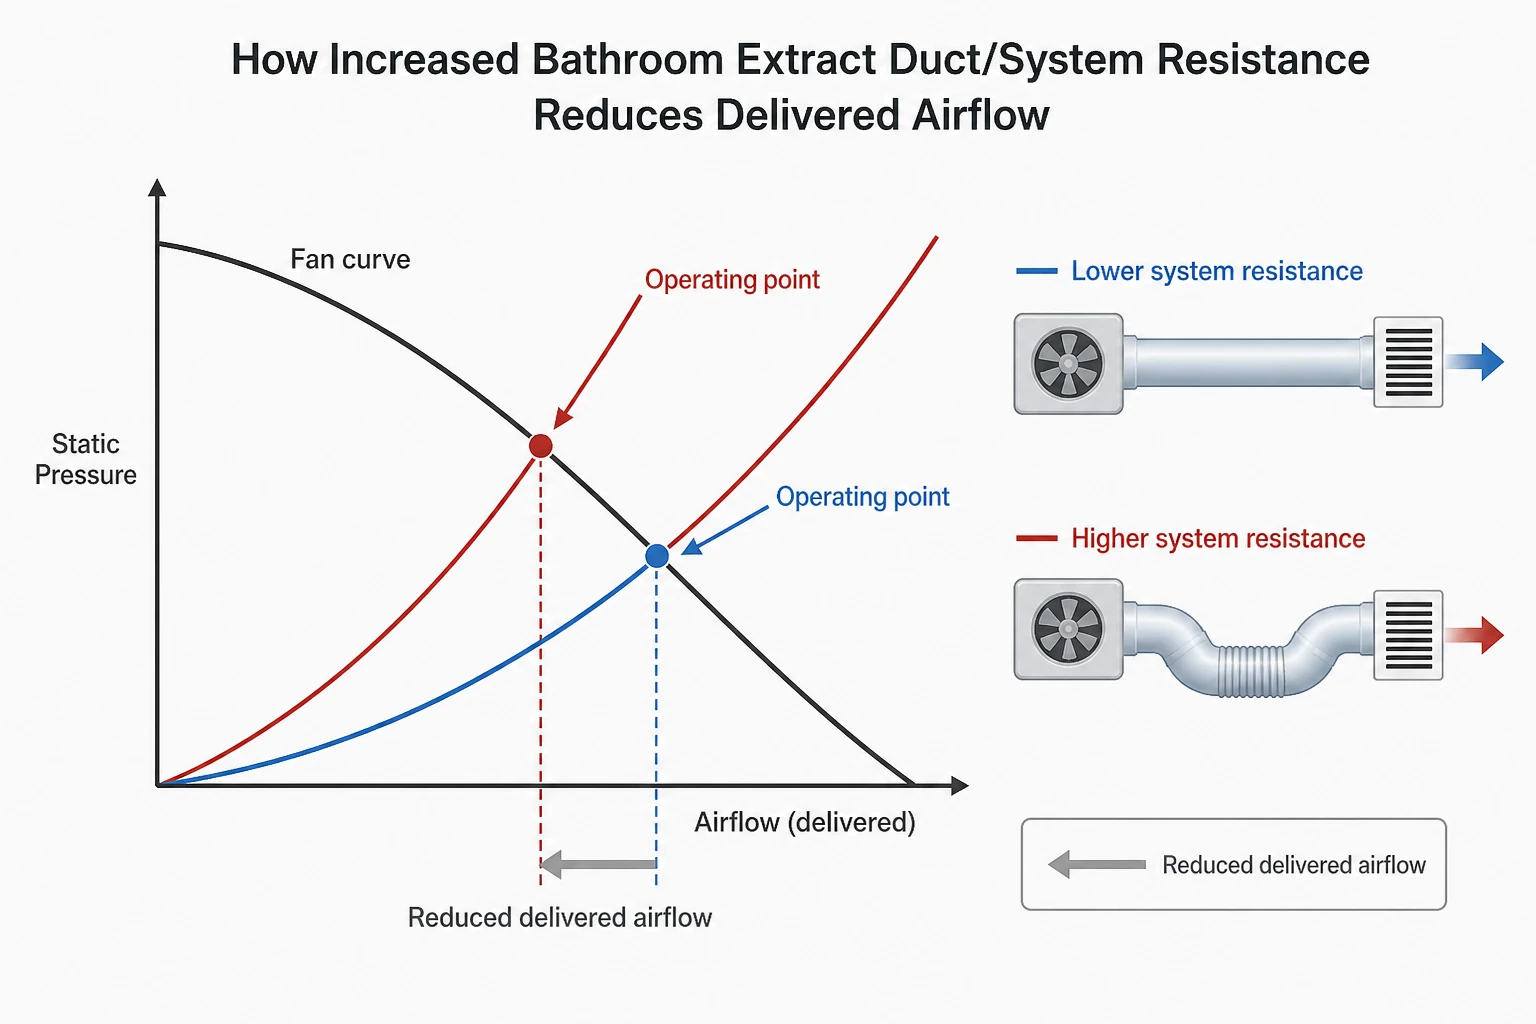
Flexible ducting is useful where a short connection needs to accommodate an awkward route, but it should be pulled taut and supported. Sagging, compressed or sharply bent flexible duct creates turbulence. For longer runs, correctly sized rigid or semi-rigid ducting usually provides a smoother airflow path and is easier to inspect.
Duct diameter must match the fan connection and the required airflow. Reducing a larger outlet into a smaller duct may appear convenient, but it increases resistance and often makes the system noisier. Equally, fitting a powerful fan to an existing poor duct route does not automatically solve humidity problems. Higher pressure and velocity can create more sound while delivering disappointing airflow at the external terminal.
Check the outside terminal as well. A blocked grille, insect screen clogged with debris, stuck flap or poorly positioned louvre can create a whistle or pulsing sound. External terminals need to discharge air freely while limiting rain ingress and backdraughts. They should not be obstructed by insulation, stored items or vegetation.
Air leakage and backdraught shutters
A clicking or flapping sound may come from a backdraught shutter rather than the fan. In windy conditions, an external flap can move repeatedly, especially if the duct run is short or the terminal is exposed. A loosely fitted internal shutter may also chatter as airflow starts and stops.
The answer is not always to remove the shutter. It helps limit cold-air ingress and unwanted reverse airflow when the fan is off. Instead, check that it is compatible with the fan and duct diameter, clean its hinge area and ensure the duct connection is secure. Where wind exposure is the main cause, the choice and position of the external terminal matter as much as the fan itself.
Vibration travels through walls and ceilings
Sometimes the motor sound is modest at the fan, but the ceiling, stud wall or ductwork amplifies it. This is structure-borne noise and resonance can amplify it. A fan screwed tightly to a lightweight panel can transfer modest vibration into a ceiling, housing or nearby ductwork, turning a small hum into an intrusive drone in the bathroom or the room above.
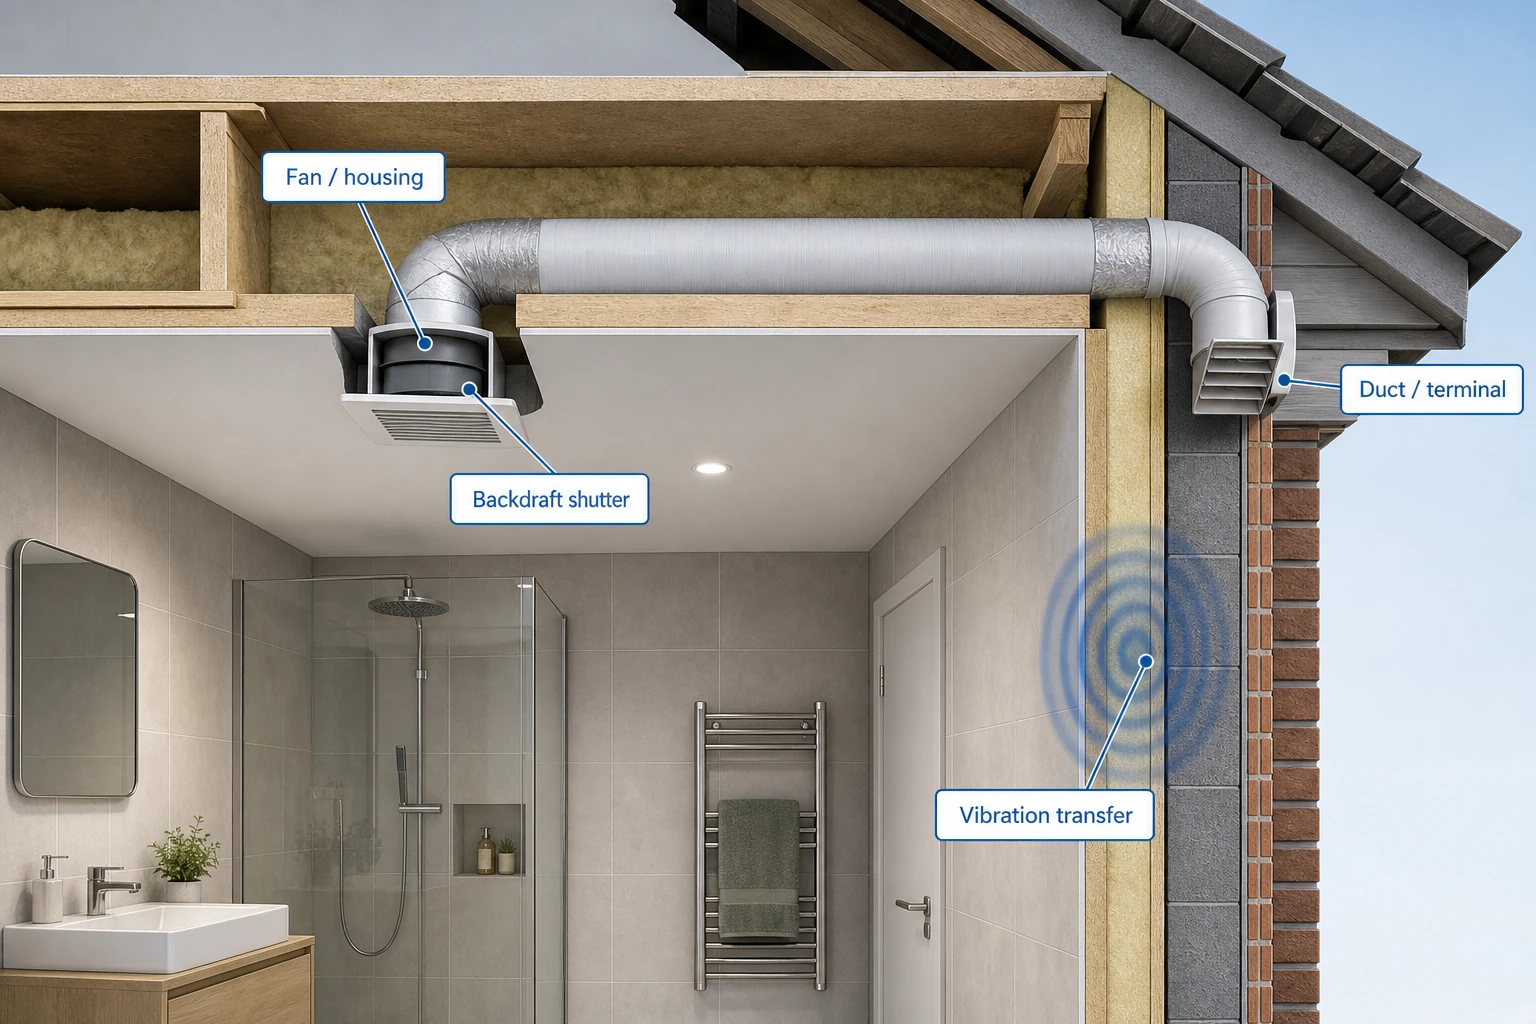
Check that the housing is firmly mounted but not distorted by overtightened screws. Loose fixings cause rattles, while excessive pressure on a plastic housing can affect impeller clearance. Duct connections should be supported so their weight does not pull on the fan spigot. Rigid duct sections need secure joints, and any nearby pipework or timber that touches vibrating ductwork may need repositioning.
For installations where low noise is a priority, the fan location is part of the design. An inline fan placed away from the bathroom can reduce motor noise at the ceiling grille, provided the unit is correctly sized for the duct run and remains accessible for servicing. This arrangement still needs careful duct design: a remote fan cannot compensate for severe restrictions, unnecessary bends or an unsuitable external terminal.
Controls can make a fan seem noisier
A fan with a timer, humidity sensor or continuous low-speed setting may run longer than expected. That can make a normal operating sound feel excessive, particularly at night. Before assuming there is a fault, establish which control function is active.
Humidity-controlled fans respond to moisture levels rather than simply the light switch. After a shower, they may continue extracting until humidity falls. If a bathroom is consistently damp because of drying laundry, poor heating, cold surfaces or air leakage from another room, the fan may run frequently. The useful fix may be better moisture management or improved ventilation capacity, not disabling the sensor.
Some fans offer adjustable speed or boost settings. A high boost rate can be appropriate for a busy shower room, but it will generally create more airflow noise than a lower trickle setting. Selection should be based on the room’s required extract rate, duct resistance and intended control method. Compare airflow in cubic metres per hour, available pressure in pascals, sound data in dB(A), duct connection size and electrical consumption rather than choosing solely by the lowest advertised noise figure.
When cleaning is enough, and when to replace the fan
Cleaning and tightening a grille are reasonable first steps if the fan is extracting properly and the noise developed gradually. Inspect the visible duct connection and external terminal at the same time. If airflow improves and the noise settles, continue with periodic cleaning rather than waiting for build-up to return.
Replacement is more appropriate when there is bearing noise, repeated starting problems, cracked housing, heat damage, water ingress, an obsolete electrical arrangement or a fan that was incorrectly sized from the outset. A replacement should not be selected by faceplate size alone. Confirm the duct diameter, mounting depth, electrical supply, timer or sensor requirements, IP rating for the bathroom zone, airflow requirement and whether the existing duct route can support the chosen unit.
For longer or more complex runs, an installer should assess the full system, including bends, duct material, external discharge point and pressure losses. This is especially relevant in flats, internal bathrooms and renovations where ductwork is concealed. HavenPoint’s ventilation range is intended to support that whole-system approach, from bathroom extractors to ducting, terminals and installation accessories.
Do not ignore a fan that becomes suddenly loud, smells hot, trips a protective device or shows signs of moisture around electrical parts. Isolate it and arrange inspection by a qualified electrician. A correctly selected, clean and properly ducted fan should clear moisture with a controlled, consistent sound, not compete with the shower for attention.
Still unsure whether the noise comes from the fan, ductwork, shutter, or installation? Read the extractor-fan noise troubleshooting guide